Sunday, December 19, 2010

Weinachts Kleidung - Kapitel Zwei


I mentioned in previous posts that I had corduroy enough for overalls for Brody. Ta da!!


Brody, like his father, James loves all things with wheels, so naturally I embroidered a little car on them. Of course, when I say "I embroidered" I really mean that I engaged my Elna Embroidery machine (which I got for Christmas last year) to do it.


I had some leftovers of velour that I wanted to use, but there wasn't enough for leggings like his girls cousins (which is just as well, as I doubt his father would have encouraged his dressing to match girls), or a T-shirt as I had hoped, so I went scrounging in my stash. Voila! I found remnants of a wonderfully soft, super-fuzzy white sweatshirt fleece. I have no clue what was the original garment from whence this came. I haven't bought any sweatshirt fleece since we moved to Texas 16 years ago. I brought with me a considerable collection that I had purchased in Tacoma, WA, and have been using it on the rare occaisions that I feel the need to make something that warm in this hot, humid climate. So, I've had this piece for a while. It was just enough to get the body and sleeves of a shirt for Brody, and I cut the neck and sleeve bands and pocket out of the leftover velour.


Naturally, the shirt's pocket needed a little red car, too.


What do you think??? Fergus likes it!!

Saturday, December 18, 2010

Weinachts Kleidung

A month or so ago I won a raffle bag at our local quilt club meeting (you may read our monthly newsletters, and get info regarding meetings at: http://panola-co.tamu.edu -- all are welcome) that contained 1-yd cuts of 5 coordinating fabrics. {and, may I just say: "Yippeeeee!!!!!} One of the fabrics, however, didn't look as good with the other 4 as they did with each other. When I pulled it out of the stack, and scrutinized it by itself, I immediately thought: little girl's dress!

Since I hadn't yet sewn clothes for Emma Rose, I decide to make an outfit for her. The print reminded me of the one's worn on the show Little House on the Prairie, so I set about making a dress in that style. I thought that a pinafore over it would just be the thing to finish off the look, and yet, I didn't stop there. It's cold in Pennsylvania where Emma Rose lives (see: http://varinascostume.blogspot.com/ for commentary), so I made a jumper out of corduroy, and added matching velour leggings. As a bonus - the velour is so wide that I had enough fabric to get Myra leggings, too. Also: the corduroy was on sale for such a great price, I bought enough to make Brody David overalls. I cut them out this morning, and am hoping (fingers crossed!) to get them finished and wrapped by Christmas.


Here is the whole outfit together. The dress is McCall's 4641, altered only by lining the bodice of self fabric. The jumper is Butterick 4009, altered only by lining the bodice of matching Ambience leftover from a skirt of mine. The leggings are from the Ottobre magazine issue #04/2004-2.

What do you think???

Sunday, December 5, 2010

It doesn't fit -- how can this be?????

Sewing has always fascinated me, from the artistic aspect -- which buttons with which fabric? --- to the mathematical -- manipulating a plane, a 2-dimensional object, to fit a body, a 3-dimensional object -- what's not to love?? Sometimes it frustrates me, but that can be fascinating, too. This is one of those times.


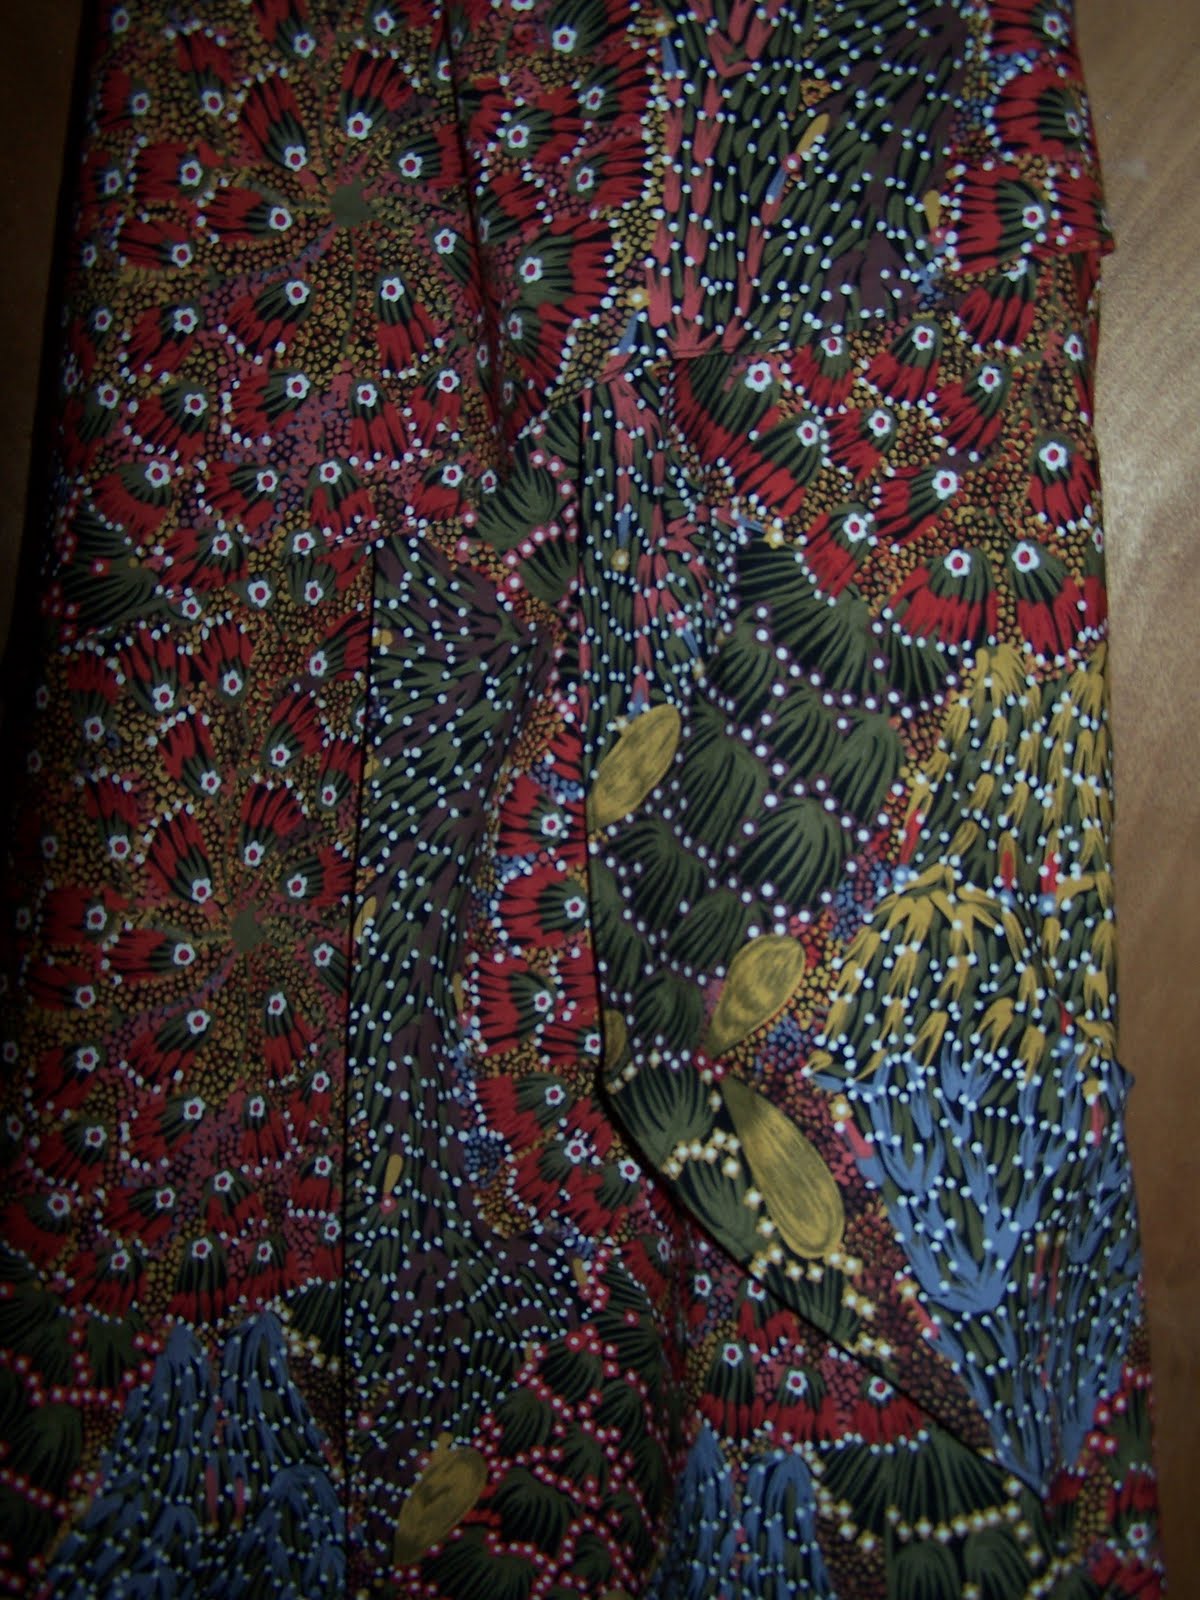
Whilst attaching the facing of this blouse to the front panels, I was horrified (NOT too strong a word, considering the price of the fabric, and its local unavailability) to discover that the pieces didn't fit by several inches. How can this be??? They were cut at the same time, using the same pattern pieces. They were certainly the same size when I cut them out 6 weeks ago!


Two explanations, which are both applicable: 1) the facing piece must have shrunk somewhat when I steam-fused the interfacing to it, and, 2) the front panel must have stretched somewhat when I ironed it flat, post-application. [remember my virgin post of "pressing vs. ironing"]

Okay. Now what? I see 2 options, here:
1) Cut off the longer piece to fit the shorter one. I immediately reject this one, as it requires that I cut the entire hem by 3 inches, causing the blouse to land at a very unflattering spot on my prodigious, now completely useless, child-bearing hips. This could be, however, a great option for other projects.
2) Stretch to fit. This worked for me. Since the edge had a decided curve to it (read: bias), it stretched nicely without any risk of tearing. The interfacing I used was a weft-knit, and had some stretch to it, as well. This did, however, leave me with another conundrum: puckers on the larger piece - the one that shows. S * I * G * H There really is only one solution to this:

Lie. Lie, until your pants actually burst into flames. If the puckers' location is symmetrical, and not-unflattering, you may pretend that they are a design element. (" I meant to do that.")
Said with enough bravado, this method could fool Chanel herself. Add a note of incredulity to your voice, and a look of disdain to your countenance, and the questioner will regret having raised the question. Practice with me now: "This? Why ---- it's a design element!"


Well, there is another option. One that I attempted with mixed results: press the little buggers out.
The trick here is to relax the fibers as much as possible, manipulate their shape to the one desired, and fix that shape permanently. Saturating the fabric with water will relax the fibers nicely, and your iron will seal the deal. I keep a mister bottle full of distilled water nearby for just this purpose. Why distilled water, instead of tap? I want no risk of mineral deposits marring the finish of a fine fabric.

Here are the results. Not bad, eh? I retain the option of lying, as I have that 'look of disdain' down pretty well.

Now --- on to the collar!

Tuesday, November 30, 2010

Emma Rose's Muppet Blankie

I confess: I am not much of a knitter. Oh, I know -- people who don't know how to knit at all think that I am wildly talented. My daughters are not in that group. [see:http://katiekadiddlehopper.blogspot.com/ and http://varinascostume.blogspot.com]

My pitiful knitting efforts are mostly confined to blankets, scarves, and flat things without fit or shape. very. basic. knitting.

Once in a while, however, I see a yarn that must be made into a baby's blankie. Such was the case with this lovely, feathery, brightly-coloured yarn. I saw it last June, when my youngest granddaughter, Emma Rose, was still a grandfetus; but I knew the blankie had to be.

Why do I call it the Muppet blankie??? There's a story: when I first spied the yarn, it was its paler, more dignified pastel cousin that I intended to use. However, my daughter, Varina was shopping with me, and she preferred the bright one, claiming that it would bring favor with Emma Rose's dad, as it represented the colors of Muppets Sesame Street characters. A spirited (read: knock-down, drag-out) conversation ensued, culminating in my calling my son for his opinion. Daniel did, in fact, prefer the Muppet colours.

Only after starting the blankie was Varina's diabolical long-term plan revealed: she intends to wait 4 - 5 years, when Emma Rose is thoroughly enthralled with all things Sesame Street, and tell her that the blankie is made of actual Muppets. The yellow is Big Bird's feathers, the red is Elmo fur, the green is Oscar the Grouch hairs . . . Poor, poor Emma Rose.

My concerns may turn out to be moot. As you can see, when I laid the blankie out to take its picture, Fergus jumped on, and immediately settled in for some serious pur-r-r-r-r-ing.


I may need to get some more yarn for Emma Rose.

It will be genteel pastels.

Sunday, November 28, 2010

Black Friday deals

I must admit -- I am not generally a Black Friday shopper. There is hardly any bargain in the world worth getting up (or staying up) to stand in line in the dark, and fight crowds that will induce me to such behaviors. [I discourse in slightly greater length on this subject in my weekly column in the Panola Watchmen {http://panolawatchman.com/index121.htm}]
This year, however, I no longer live in a city that has ready access to all things retail, and I found myself visiting my daughter, and her family in Temple, TX. Hancock fabrics had a great sale on Vogue patterns that neither of us could resist (as, when have we tried?? OR: why would we????), so we braved Friday morning crowds, both of her little angels in tow to snap up some bargains. I got these:


The first two I bought because in the lines I saw many wearable art possibilities, and the others I liked pretty much as designed.


Then, when Mitchell finished rounds and came home to watch the kids for us, we headed to Austin, because neither of us had yet visited The Domain; and we rightly assumed that most of the ultra-high-end stores there would not have Black Friday deals that would attract huge crowds. We were half right: no deals, huge crowds anyway.
En Route to The Domain we spotted a Jo-Ann's, and, as I was looking for corduroy to make a jumper for Emma Rose to match a particular calico, we braved the crowds.
I found the fabric I wanted, and some velour for leggings to match. The velour is so wide that Myra will also get leggings out of the cut, and the corduroy was such a steal that I bought what remained on the bolt, giving me enough fabric for overalls for Brody out of them.


Wasn't this supposed to be the year that Sarahbelle sewed for Sarah?????

s * i * g * h

Thursday, November 18, 2010

Work in Progress

I've been outside of the sewing loop lately. Other aspects of my life have commanded my attention.
For the skirt I recently made (post of 17 Sept 2010), I sewed a casual bamboo knit top to go with it for casual/business casual events (post of 19 Sept 2010), but I wanted something more dressy also. A beautiful coral silk habutai that I bought from Thai Silks (http://thaisilks.com) at Expo this past March (post of 9 March 2010) is just the thing. It's not finished yet, but there is some progress:


It is all cut out of Vogue 8322, and interfacing - a medium-weight knit - is fused.


Buttons have been purchased that are so attractive as to serve for jewelry. [What was the thinking, here? I love getting new jewelry! Maybe it was that the coral-coloured stones on the buttons are fake. I should never wear real coral, as its production necessitates the destruction of a delicate biome, and I never wear fake jewelry, as -- why should I? -- my husband buys me the real stuff.]


Both machines are cleaned, oiled, have new needles and are threaded. Wait a minute -- both machines???? Since I am sewing a fine, drapey silk, oughtn't I construct with French seams instead of the serger???


Review post of 27 Sept 2009 for the answer.

Saturday, October 30, 2010

A Binding Proposition


I (with help from Pfaffie) am done quilting Emma Rose's blankie, so it is now time to bind the edges.
First, it is essential that you have the right equipment. Here is one of the most important pieces of equipment in my arsenal -- a kitty. Fergus likes to hang out nearby when I am working around the house. Here, he is napping atop my Embroidery machine. [Dust covers are another essential piece of equipment.] How does my kitty help the sewing/quilting process? He makes me smile. Smiling makes any endeavor seem to go faster.


Quilting done, the next step is to determine exactly the amount of overage needed to fold over the top, tuck under and bind.


There are 2 methods for doing this that I use: the first is to lay the quilt on a flat surface and fold and pin, re-fold and re-pin, basically play with it until you are happy and repeat all around. I call this the SWAG method. (Scientific Wild-Ass Guess). The second is the one I actually used on this quilt. Whilst folding and pinning, I discovered that there was a 4-ft stretch along one edge that only had 2 inches of overage. Ergo, the overage could only be 2 inches. I (along with roughly 40 Million French sewers and quilters) call this fait accompli.
Mark your overage all around, then trim to markings. As you see, I mark with pins. Marking with a water-soluble or erasable marking pen is an excellent idea -- I just can never seem to remember to buy one of those things!


Now, fold and press. The corners are tricky, but don't worry about them - we're getting to that - press each side independent of the next, not worrying about the corner. Pin sporadically to hold in place.


Corners can be managed 2 ways -- mitered, or lapped. In my opinion, there is no aesthetic advantage to lapping, and it is generally done only by quilters who don't know how to miter a corner. I'm not going to let that happen to you, Dear reader! Here's how to miter:
On your ironing board, post-pressing edges, lay your item face down. Fold back the 2 sides comprising the corner to be mitered. Pin the edges together, placing the pin flat against the backing/wrong side of garment. This is your stitching line.


At your machine, stitch from outer point to folded edge. You may back-stitch, to lock the stitches, but you will get a sharper point if you start with a tiny stitch (pulling thread tails taut behind the pressure foot), and increase gradually. This is easily done on your computerized machine, it can be done on most mechanical machines, if you stitch slowly.
Trim the excess fabric to 1/4 in. and turn.


Here is the finished corner, and quilt.
Done!!!!!
Viola! Neat and pretty, non?

Monday, October 4, 2010

Fuzzy, Hoppy quilt (top only, so far)


When Varina and I visited Sewing & Stitchery Expo, one of the many quilt patterns I purchased was the "Hip Hop Quilt" from N.E.I Enterprises (www.EasyPatternStore.com OR: muddledmadness@verizon.net). When my son, Daniel (http://goodevilgenius.tumblr.com/ OR: http://joestryker.com ) called to tell me that his anticipated child was going to be a daughter, I knew I wanted to make this for her in pinks and pastels. Particularly, I wanted the bunnies and carrots to be fuzzy and soft, so they are made of Minkie, and the bunny tails are made of fake fur. ( No actual rabbits were harmed in the making of this quilt.)
This quilt top went together beautifully. It probably would have gone even easier, if I had paid closer attention to instructions, and not made a couple of mistakes. For instance: I somehow cut out 2 bunnies facing left and one facing right - opposite the directions. I didn't think that would matter in the least, but it affected the direction of the carrots, and the number of 12 in. strips vs. 18 in. strips in the closest border. This cause some measure of angst, as, except for the bunnies, carrots and their backing blocks (which was made of fabric purchased for this quilt) , all of the strips and squares were made of fabrics scraps from other projects. The peach sprigged gingham was first used in a quilt I made for my first grandson, -- 2 years before he was conceived. No running to the store for more of this fabric!! Fortunately, I had enough to cut more of the needed strips.
The "Baby Girl" fabric (2nd border) is scraps from a quilt I made for Myra. (I made blankies for my other grandson, Brody, but they were all blue, and didn't work for this quilt. Brody will soon be joined by a new boy-cousin, and will contribute scraps for a quilt for him -- someday.)
So, this quilt is a little bit from Logan, and a little bit from Myra, and a lot bit from Oma Sarah. I hope that someday Emma Rose will love it, as much as I love her.

Monday, September 27, 2010

Kitty Love!


My new kitty, Fergus, loves to help me sew and quilt. Unfortunately, he is too young to be trusted with a rotary cutter, so he really isn't much help at this point.
His talents will be much more useful when the quilt is done, and I need some quality control.
[Which explains why so many of my projects are embellished with cat hair.]


Fergus also loves wrestling with his combat bear. Fergus is a fearsome fighter. He always beats the bear.

Sunday, September 19, 2010

and now, the top

To go with this skirt of the previous post, I used a lustrous bamboo knit that I bought at Expo from Vogue Fabric Store. The fabric drapes, wicks, breathes, its production is kind to the environment -- it is wonderful!!
The pattern -- eh.

I used Butterick 5354. I love the design. The construction -- well, probably my dissatisfaction is my own fault. Since the pattern specified using 2 or 4-way stretch knits only, I assumed that I was making a t-shirt. As such, I ignored the pattern's instructions and proceeded as I always do to make a Tee. Wrong. This is not a T-shirt. It is a blouse made of knit fabric.

I started off on the wrong foot, with the fit. I cut a size 20, as that is the size that corresponds to my full bust measurement. had I been making a large, shapeless Tee, this would have been fine. Instead, I have a shirt that fits at the bust point, but is too large in the neck and shoulders. had I treated it like a blouse, I should have cut a size 16, and done an FBA.

Then there's the sleeves. A typical T-shirt applies the sleeves flat to an open armsceye, then sews the underarm and side seams at once. This pattern instructed to sew the side seams, sew the underarm seams, install ease stitching, and attach it in the round. I ignored this, and sewed it flat. Wrong. Now I have some tiny puckers in the sleeve cap, and a slightly protruding point (possibly only noticeable to me) at the top of the sleeve. Since I attached the sleeve with my serger, ripping it out would take more than the seam allowance, and would not leave me with enough fabric in either the sleeve cap or the armsceye to re-construct. I am going to have to learn to live with this. Oh, bother!

Still, I like this pattern well enough, that I shall make it again. I think the tucks around the neckline are flattering, and lend a polished look to an otherwise ordinary top. This style is pretty enough to wear to work with a suit, even if this particular shirt made of it isn't!

next up: monkeying Around PJ's for my grandson, Logan. Then, I'll get back to making a silk blouse and jacket for the rest of this ensemble.

Sunday, September 12, 2010

Sewing up Expo


You may recognize this fabric as part of the haul from Sewing & Stitchery Expo. It is a cotton/rayon plain weave, whose hand is somewhere between a challis and broadcloth.
I made it into out of a Vogue pattern 7880. I had used this pattern once before, to make a thin metal-flecked silk/cotton gauze that I bought in Dubai.
This skirt has a completely different look, and attitude to it. The gauze one is a grayed-pink, and is floaty -- somewhat ethereal. I wear it with a pale pink silk Tee, and a short unlined jacket of the same gauze as the skirt.

This time around, the fabric is more substantial. It hangs straight down. I am making a hot coral pleated-neck top out of a bamboo knit to go with it for business casual, and a light coral silk charmeuse blouse, and olive damask jacket for a more polished professional look. Those items are still in my head - but I have purchased fabric and patterns for them, so it will happen!

This pattern is less challenging to sew than it first appears. Keep each pattern piece with its fabric piece until needed to avoid confusion. The only tricky part is the stay. A short, kind of half-lining, it is attached to inner layers that are longer than outer ones, and then attached at waist. Sew the wrong side of the stay to the right side of the bottom layers and when you attach it and turn, the skirt will be lined.

I shall keep you updated on the rest of the ensemble as it progresses. Time, work, family, and energy permitting.
Fingers crossed!!!

Monday, August 30, 2010

Scarlett's sad little dresses

When I worked on my undergrad degree at the University of Texas, my unique major (Textile Artifact Conservation, within the broader scope of a BA in Human Ecology), allowed me access to the Historical Garments Collection, the Rare Books library, and the opportunity to do research on the GWTW collection of garment artifacts at the Harry Ransom Center. [BTW: Scarlett O'Hara's waist may have been 17-inches -- Vivien Leigh's was not.]
It is a stunning collection. Scarlett O'Hara (Hamilton Kennedy Butler) was nothing if not fashionably, and superbly clad. Of course, the famous "curtain dress" is the hallmark of the collection, but, in fact, it is merely one of hundreds of thousands of artifacts in the Ransom Center's possession. There are scripts, props, hand-written notes by directors and writers, costume sketches in Walter Plunkett's hand, and scores and scores of petticoats (Director David O Selznik insisted on authenticity to the tiniest detail).
Sadly, the garments have not always had the care they require. In order to be displayed they must now be repaired, restored and displayed oh(!) so carefully.
UT has mounted a major fund-raising effort to solicit contributions for this effort.
I confess: I have mixed feelings. Such an important collection of American literary and film history ought not be allowed to fall unaided to the ravages of time.
From design to materials to construction, these dresses continue to educate and inspire creators of current and future art.
I am bothered in the extreme by the fact that my alma mater has allowed this level of negligence to occur.
I am simultaneously gratified to see that something is, at last, being done to rectify the problem.

You may view the collection, and read the fascinating history of its association with the University of Texas here:

http://www.hrc.utexas.edu/contribute/endowments/opportunities/costumes/

Let me know what you think.

Sunday, July 25, 2010

Finally!

I know -- I asked for pattern advice regarding the teal knit nearly 2 months ago. I just finished it this afternoon. Other stuff to sew/quilt/knit keeps coming up!

The pattern went together beautifully, and quickly (1.5 hours sewing time, including pressing, changing serger from 4 to cover/chain to 4 thread operation).

I followed the instructions pretty closely, with the following exceptions:
1) I raised the point at which the front drapes starts at top 3 inches, fearing it would be too low cut.
2) Instead of clean-finishing the front edges and hems, then topstitiching them, I used a cove/chain stitch on the serger to accomplish it in one step.
3) Instead of gathering the front drape to fit the side panel, I adjusted the differential feed on the serger to do that while connecting the seams.
Have I mentioned lately how much I LOVE my BabyLock???

I was warned that Christine Johnson patterns run big, but failed to heed the warning. Now I shall be taking up the shoulder seams, and, may be putting a dart or two in the back.

Still: it's done!

Do I look as sassy in this as I think I do?

Saturday, July 17, 2010

No time to sew, but still sewing . . .

This past week I taught a group of 7 wonderful young ladies (age range: 7 - 13 yrs.) some of the basics of sewing. In an intensive, 5 hr/day - 5 day week, we learned about sewing machine functions, care and maintenance of one's machine, fabric selection, pattern selection, fabric preparation, pattern layout, seam construction, seam finishes, elastic insertion, understitiching, construction differences between woven and knit fabrics, embellishment, waiting one's turn for help, and the fact that Miss Sarah does not, in fact have the instructions to every pattern ever printed in her head,and that one should read the instruction sheet and try to understand before giving up and whining. I'll admit: this last was hard-learned. I am exhausted!!!!

The girls each made a knit T-shirt, and coordinating sleep pants. A couple of the girls finished their basic project early, and made tote bags, which I e
mbroidered with their names. Here is a picture of the motley crew at week's end.

After a hard, but fun week of learning the language of sewing, we then had cake!!!!
Now, back to projects at home for myself. Maybe. First: a nap.

Sunday, June 20, 2010

and one more


Whenever I make a bunch of purely functional receiving blankets, I like to also include one particularly lovely not-just-functional one.
This is it.

I started with a 45in square of flannel. This one has tiny lilac flowers. Then I cut coordinating lilac checked flannel into 45 X 9 in strips. For the corner pieces, I cut 9 in squares.
I sewed 2 squares to the ends of 2 of the checked strips, and attached them to the flowered square at opposite sides, attaching the remaining 2 strips to the other 2 sides, sewing all the way across. No, it does not work to construct the strips into a square, and attach it. Flannel sometimes stretches while sewing, so attaching one strip at a time allows you to make adjustments as you go.
The border attached, I then pressed under a 1/4in finish all around, then folded the border's pressed edge to the wrong side at the seam allowance (encasing the allowance, as I press).
Before stitching the border down, I mitered the corners, trimmed, turned and everything went smoother.
After the border was stitched, I attached eyelet trim, beaded with lilac satin ribbon.

Would anyone care to see a mitering tutorial, step-by-step????
I can do that.

Tuesday, June 8, 2010

Blankies!


This does not represent the greatest challenge to my skill, but I love making receiving blankets for new babies!!
These blankies are for my newest grand-daughter, Emma Rose Jones, who is due in late July.
I make the blankies bigger than standard receiving blankets -- they are 45 in square. This way they will be used for a long time -- from swaddling to summer naps to flags for living-room forts. After washing in hot water for maximum, and final, shrinkage, I true up the edges by folding a selvage to a cut edge, and clipping, then ripping the excess. Then, I search my stash of pretty colors of wooly nylon and serger thread. {note: the variegated purple is new for this project -- what do you think?}
Setting my Baby for 3-thread operation on a medium-narrow stitch, with short length, I then overcast the edges, changing threads as needed -- or as the mood strikes.
Next project for Emma Rose is a quilt made of Minkie and flannel. My grands deserve the cuddliest blankies ever!!!

Thursday, June 3, 2010

Help request


I promised that I would make up the teal interlock I had bought to go with my new pants. Towards that end, I have gotten as far as washing the fabric, and trying to select a pattern. And herein squats the toad.

I cannot decide between these 4 patterns. Each has much to recommend it. Some of them I have used before, and know what to expect, others I have not yet used, and am anxious to do so. 2 of them are surplice front (so: I am not considering the other views in these 2 patterns), yet each wraps in a different direction (meaning that one of them is the traditional female right-over-left, and the other is avant garde!) Of the other 2, one has a built-in faux shrug, that I think is adorable, but the neckline looks a tad low, and broad for modesty. I can adjust that -- but, do I want to?? The other has a cunning mini-boat-neck cum cowl. Very interesting construction on this one.

What do you, dear readers, think?? Remember: I have a short, squatty neck, full, high bust, and soft, pudgy midriff.

The fabric, on which the patterns were photographed, is 97% Sea Island Cotton/ 3% Lycra. Very soft, has a lot of drape, a little on the thin side -- quite sumptuous.

I anxiously await your opinions.

Tuesday, June 1, 2010

Paris Pants!!


I finally finished a project for moi! It was an extremely easy pair of pants, yet still took a couple of weeks to complete! s * i * g * h

The fabric is a wonderful loose-ish weave linen that I purchased recently at Sewing & Stitchery Expo. The pattern I used (LaFred's Thalia pants) were purchased at S & S Expo 4 years ago. Okay. So it took me a while. I get around to using everything I buy, eventually.

I really struggled over the best use for this fabric. I purchased it with not an idea in mind as to what I would make of it -- only that it was bottom weight or jacket weight, and I really didn't want all that busy-ness near my face. So, it would be a skirt or pants.

After I got it home, and washed it in HOT water, I was happy to discover that it wrinkled only slightly, and not unattractively, and shrunk hardly at all. Quality is always worth the investment. [read: not the cheapest fabric I've ever bought.]

Much searching, and not a little angst was involved in choosing a pattern. When I purchased the Thalia pattern, I envisioned rendering it in a soft, challis with a soft hand and a lot of drape. (I still intend to do that.) So, I had a hard time reconciling myself to using this full-bodied fabric for this project. I'm glad I talked myself into it!!

The pants are very comfortable, were easy to fit, and look nice enough for work. I immediately set about searching for a great interlock to make a t-shirt to coordinate with this, found a lovely teal for that purpose; but got sidetracked by a dear friend.
This past month at our local Quilt Club meeting, I presented a class on all of the seminars I had taken at Expo, and brought with me all of the patterns, books, CD's, and fabrics that I had purchased. One of the members admired this fabric, and remembered that she had an applique in her stash that would look wonderful with this print. She brought it to my office the next day, and I knew that I had to put it on a simple white tee.

Alas: a thorough search of all local fabric stores failed to offer the quality of interlock I was after. I wanted to wear it too soon for an Internet order to arrive, so I had to [gulp!] go to a department store and purchase a t-shirt ready made! Can you imagine? I simply couldn't find the same quality of fabric on the bolt. Where does Ralph Lauren shop for fabric?? He found just what I was after!!

I don't normally go for a 'cute' look -- but, Barbara was right: this adorable applique was just the thing for this ensemble!
I'll get that teal t-shirt made someday.

Monday, May 17, 2010

A-a-a-a-r-r-r-r-gh!!

My next project will be utilizing one of the pieces I bought at Expo, this past Feb. If you recall (scroll down to previous posts, if you don't), I bought a fun linen print, of Paris Cafe scenes in teal, black, lime on natural linen.
Last night I pre-washed it in hot water, and machine-dried it, so as to incur all the shrinking it will do. Then I measured it.
I have 2 yd, 17 in of a 54 in wide fabric.
54 inches wide!?!
Who does that anymore?
Worse, I am hard-pressed to find a pattern in my collection that includes fabric yardages for 54 in fabric. Once, all patterns did.

Why don't pattern companies include yardages for widths of fabrics that mills still use???
And no, David, calculating the total square footage doesn't help. Not all problems in life are solved by a standard geometric principle.
A-A-A-A-R-R-R-R-G-G-G-H-H-H!!!

Sunday, May 16, 2010

Decades of Style -- hours to sew


I love vintage fashions, and my sweet husband bought this pattern for my most recent Birthday.
It is from the company: Decades of Style. (www.decadesofstyle.com) This design is adapted from typical, feminine skirts of the 1930's -- this particular one is from 1936. Decades of Style pattern company faithfully recreates American women's fashions from each decade of the 20th Century. They do not, however, dictate vintage sewing techniques. I like that! The construction techniques detailed represent some of the best industry techniques, and tips I have ever seen. A couple of steps looked strange to me, as I read the instructions, but made perfect sense as I performed them. I shall purchase and sew up these patterns again!


The shaped seam is not accomplished with a typical 301 butterfly (right sides together, press open); but rather, the seam allowance on the RF is turned under and pressed, then lapped RS's up, over the LF and topstitiched. I finished the seam edges first with a 3-thread narrow overlock (have I mentioned lately how much I LOVE my Babylock!!!), and topstitched with one of the decorative stitches on Pfaffie (have I mentioned lately how much I LOVE my Pfaff??), using rayon embroidery thread.


I'll make this pattern again, but next time, I'll lengthen it about 4 inches. This time I used a lightweight, loosely woven linen; but I have a lovely warm brown wool tweed that I bought last summer at Pendleton, that will make this up nicely. I didn't line this one, perferring, instead to wear a Swiss batiste slip under it -- the wool will get lined with my usual favorite Bemberg rayon.

Although I didn't need to make any adjustments for fit (some days, you just get lucky), the designer has some wonderful advice about that. Allow me to quote: " This pattern conforms to a fictional standard size." Fictional. That about sums up standardized sizing.

Thursday, May 6, 2010

Brody Bear Overalls


For Valentine's Day I made my grandson, Brody a pair of corduroy overalls with a little bear embroidered on the pocket; and coordinating long-sleeved T-shirt, on whose pocket I embroidered a heart, and into whose pocket I tucked a note that read, "Oma liebens Brody". He may not be able to read just yet, but I know he understands. I think they were adorable.


It is, of course, too hot now in South Texas for corduroy, so Brody needed new overalls. I had a great piece of blue chambray that I didn't disburse, so I cut it up into short overalls. I took the embroidery up a notch by combining an image with alphabet. 2 completely different programs on my machine that had intimidated me in February, but I was determined to conquer now. It turned out to be pitifully easy. I had to use the "edit" button. s*i*g*h

The facings are cut from a lovely vintage Battenburg Lace-edged linen table topper that I inherited from somewhere (I've had it a while). I cut off the Battenburg lace and saved it (look for it to grace the edge of a new blouse for me), and I hope to have enough linen left to get Brody a little shirt to go with his new overalls.

Check out the adorable wooden bear paw buttons. There's a little story behind that. I rarely (despite my recent disbursement) get rid of anything, so if a garment is otherwise unusable, but has great buttons, zipper, piece of lace, etc., it is saved. About 30 years ago, when we lived in Germany, I made a little jacket for James, Brody's father. A long, but fun tumble down a snowy, slushy hill resulted in tears and stains in the jacket that could not be remedied. 2 of the 4 wooden bear paw buttons were broken, but I managed to save the other two. Now James' son can wear them. Cute, huh???

Wednesday, April 28, 2010

Fabric Disbursement -- Finis!

This marks the last installment of new fabrics looking for homes.
I shall continue to update those claimed, as they are gone.
Let's get right to it:


This is another piece of upholstery fabric. It is very heavy crushed velvet. I made a pantsuit out of this material when I was in high School -- only it was in turquoise. Hey: it was the '70's! This piece measures 3.5 yd X 56in.

This great lovely is going to a sweet lady in New England who recently updated her church's on-line bookkeeping system -- bringing The Friends into the 21st Century. Ironically, she is using this fabric to make a costume for a Renaissance Festival! I just love creative people!


This lot features a herringbone acrylic tweed-type fabric. Very substantial. Perhaps it could be a vest?? It measures 1.375 yd. X 54in. With it is a Royal Blue poly crepe knit that measures 1.375 yd. X 64in.


Next up is a silver-gray polyester double knit that is 1.5 yd. X 56in. It is featured with a white poly ribbed double knit that is also 1.5 yd X 56 in.


Finally: a silkie jacquard that is labeled, "Hamill Textiles 1986" it measures 1 yd X 45 in. With it are some weirdly-shaped remnants of peach cotton interlock. I remember the shirt I made out of this. I literally wore it out, I loved it so much! Great color, super comfy, and refused to stain! The main piece measures 1.875 yd long, and half of it is 23 in wide, the other half is 14 in wide. There are also 2 large scraps with it -- one could be short sleeves, the other could be ribbing or pocket or facing.


That's all for the time being. Now: let's get stitching!!!